

Introduction
Many folks associate Kotlin with Android but its uses extend far beyond programming for mobile. We will be building a “Hello World” command-line application packaged up as a JAR file, a format just about every Java developer should be familiar with. We will also make use of Github, Gradle and JetBrain’s IntelliJ IDEA, the gold standard in Java IDEs.
Note that this will heavily reference the Batil repo.
Setup
Let’s start with opening up IntelliJ and creating a new project. Click on File ➡ New ➡ Project.

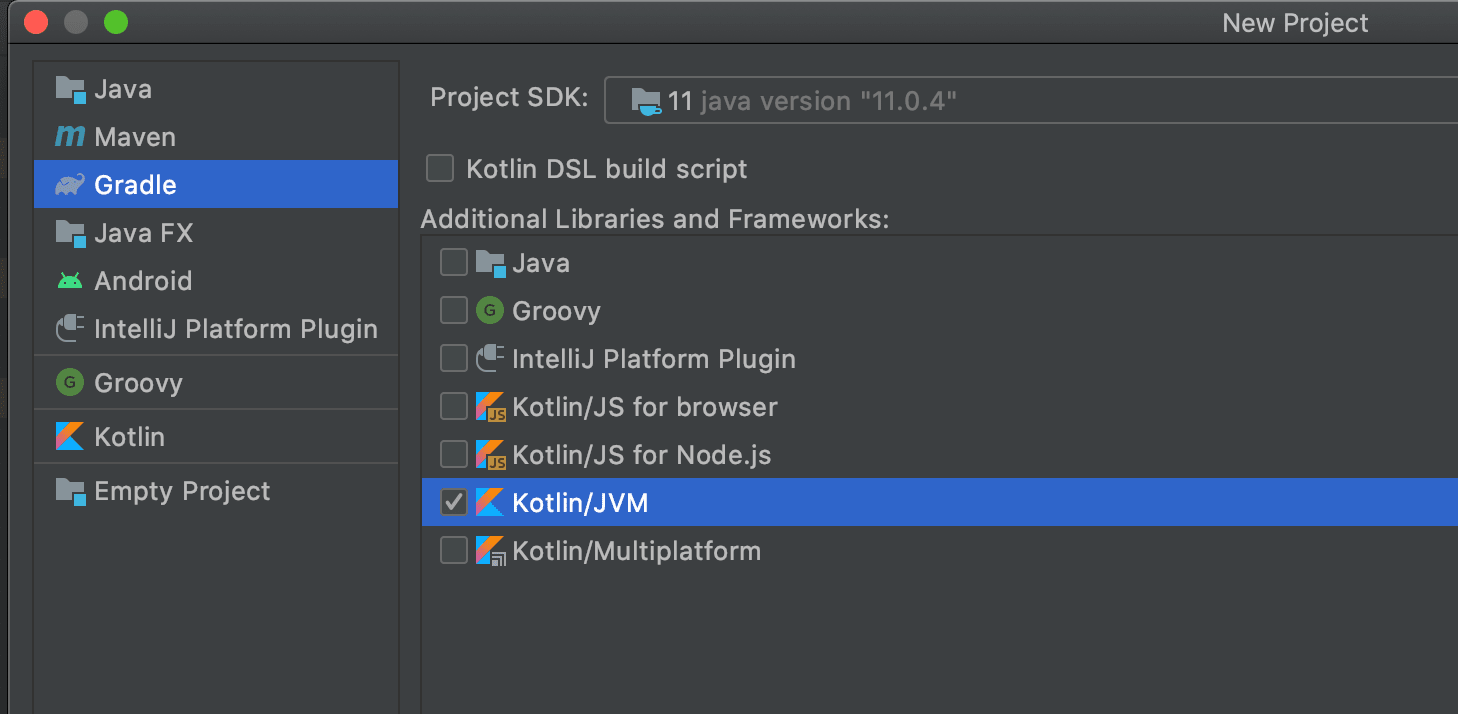
For the type of project select Gradle ➡ Kotlin/JVM. Ensure a Java SDK is present in the Project SDK field which should be pre-filled with a sensible default.
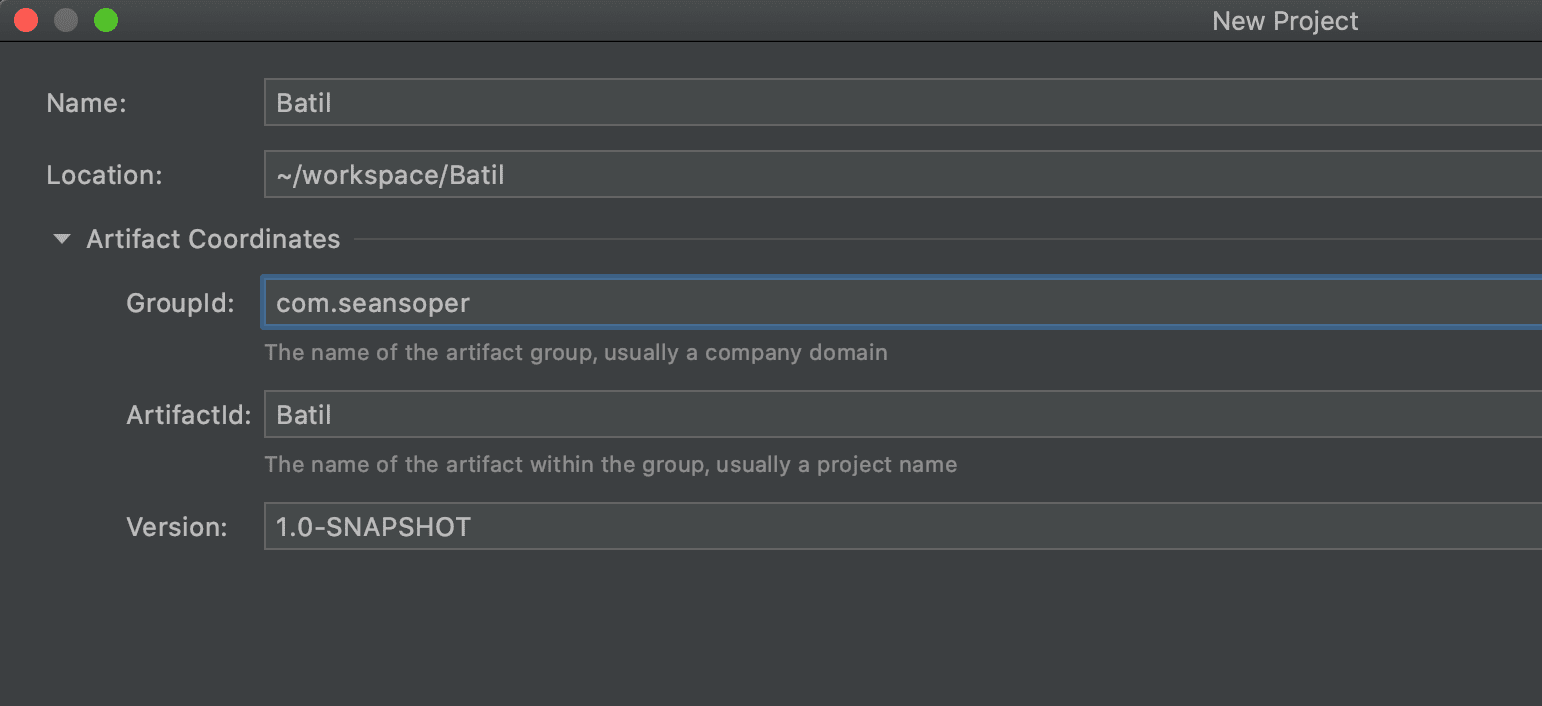
Clicking Next will take you to a screen asking for the name of your project. Note that while there are subtle differences between capitalized vs. lower case project names they are mostly up to personal styles and can be modified in the project settings or Gradle files.
A summary of these changes can be found in these commits.
Migrating to a Kotlin Gradle script
While the default Gradle script file is fine, since we are using Kotlin let’s go ahead and make our Gradle script Kotlin as well. Rename the existing build.gradle file to build.gradle.kts. This will result in some errors popping up in the console as IntelliJ attempts to rebuild a now “broken” Gradle file but no biggie, we can quickly fix those. For instance, in the plugins section, items such as
id 'org.jetbrains.kotlin.jvm' version '1.4.10'
becomes
id("org.jetbrains.kotlin.jvm") version "1.4.10"
We’ll also add a publishing section that we can use down the road for building a Maven dependency. This is what is provided by default.
plugins {
    id 'org.jetbrains.kotlin.jvm' version '1.4.10'
}

group 'com.seansoper'
version '1.0-SNAPSHOT'

repositories {
    mavenCentral()
}

dependencies {
    implementation "org.jetbrains.kotlin:kotlin-stdlib"
}
And here it is converted to Kotlin.
plugins {
    id("org.jetbrains.kotlin.jvm") version "1.4.10"
    id("maven-publish")
}

repositories {
    mavenCentral()
}

dependencies {
    implementation("org.jetbrains.kotlin:kotlin-stdlib")
}

publishing {
    publications {
        create<MavenPublication>("gpr") {
            run {
                groupId = "com.seansoper"
                artifactId = "batil"
                version = "1.0.0"
            }
        }
    }
}
Once these changes are made the Gradle script should correctly build and start code highlighting. A summary of these changes can be found in these commits.
Entrypoint
We’ll need to create a main entrypoint function where the app “starts”. There are two approaches to doing this and differ really only in style than anything else. The first involves creating a fun main at the root level of a file while the second requires creating an object with a static main method inside of it. Personally I’m a fan of the 2nd method as I feel it allows for better organization. I also like to put this in a file named Core.kt which should be added to the src/main/kotlin directory as New ➡ Kotlin File/Class.
package com.seansoper.batil

object Core {
    @JvmStatic fun main(args: Array<String>) {
        println("Hello World")
    }
}
Building the JAR artifact
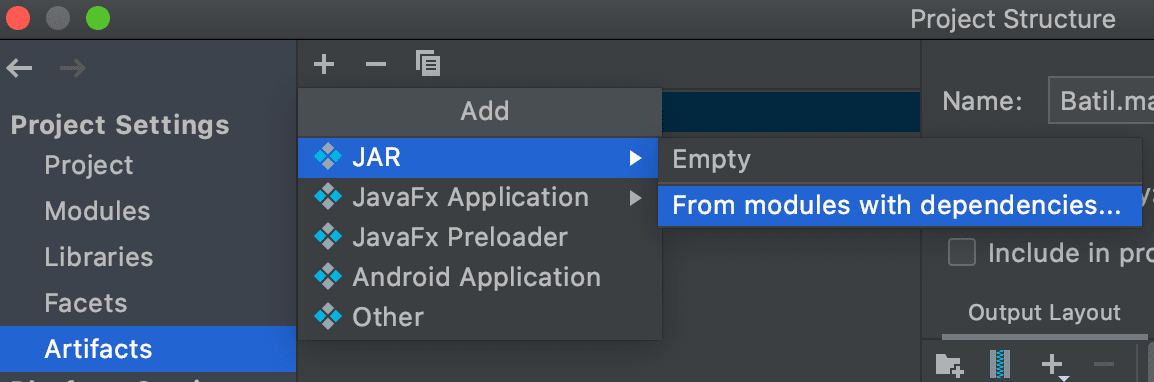
At this point there should be no build errors or issues with Gradle. Starting with Project Structure, which is the icon in the upper right that looks like a folder with small squares on top of it, we will create an artifact build target by selecting Artifacts ➡ + ➡ JAR ➡ From modules with dependencies.
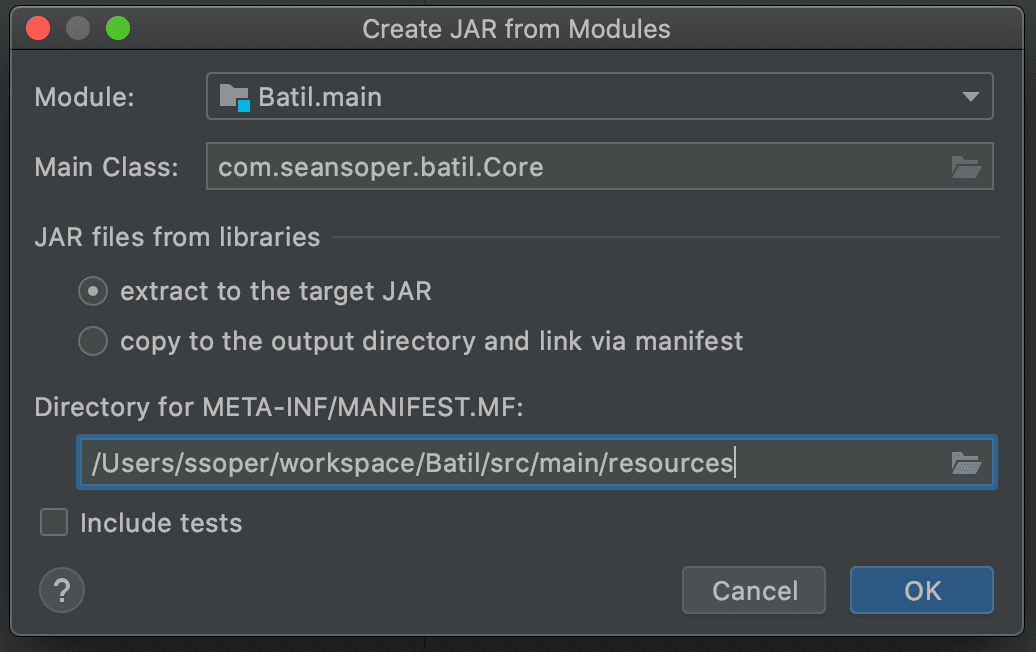
The Module selected should be the one with .main appended and the Main Class should be the Core object we created earlier. Ensure extract to the target JAR is selected and modify the value for META-INF/MANIFEST.MF to use resources.
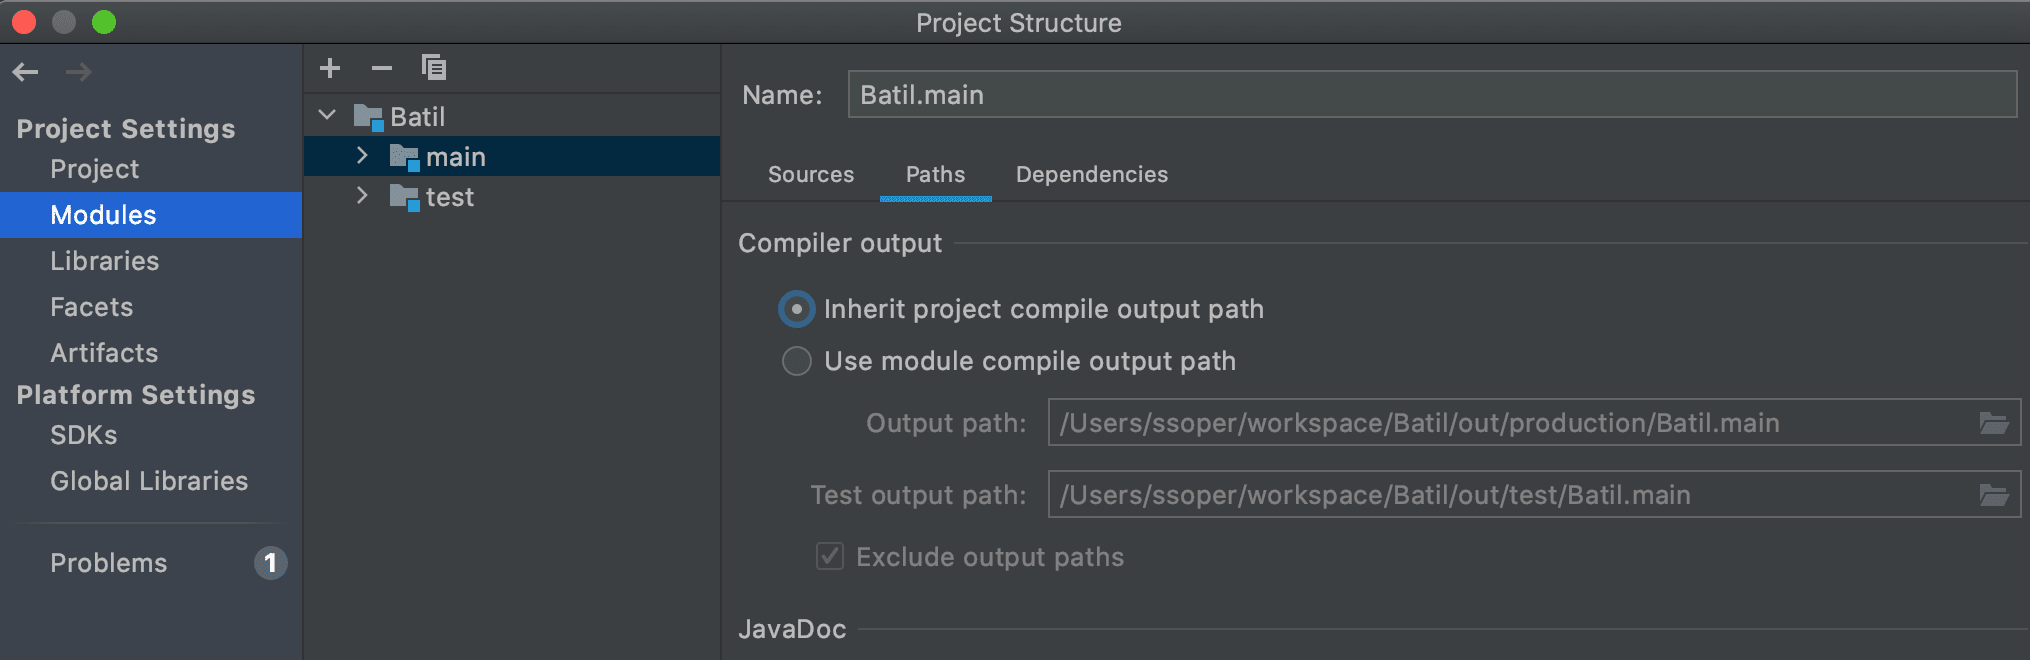
One more item to note is that you will need to update the Modules section. By default it uses the module compile output path but we need to update it to select Inherit project compile output path. If when running the JAR file there is an error about not being able to find the linked manifest this is often the cause of it.
Once these settings are updated hit Apply and then Ok. From there choose Build ➡ Build Artifact and find the resulting JAR file somewhere in the out/artifacts subdirectory.
% java -jar out/artifacts/Batil_main_jar/Batil.main.jar
Hello World
Nice work! 🙌🏻 A summary of these changes can be found in these commits.
Github
I know some folks prefer to make their git repo first vs. their Kotlin project but just in case you did it the other way here’s an easy guide to get your hard work into Github so it doesn’t get lost. After creating the repository in Github you can run these commands in your project directory.
git init .
git add .
git commit -m "first commit"
git remote add origin SSH URL TO REPO
git pull origin master --allow-unrelated-histories
git push --set-upstream origin master
git push
And of course don’t forget to add a gitignore.