

Introduction
In terms of hard problems in computer science, computer vision ranks up there as one of the toughest. Fortunately we have access to tools like OpenCV which comes pre-packaged with solutions for common problems like reading in a video feed or converting a color space. And thanks to native Java bindings, it is available for us to use in Kotlin.
Problem Set
Roughly speaking, we can break our problem down into the following steps.
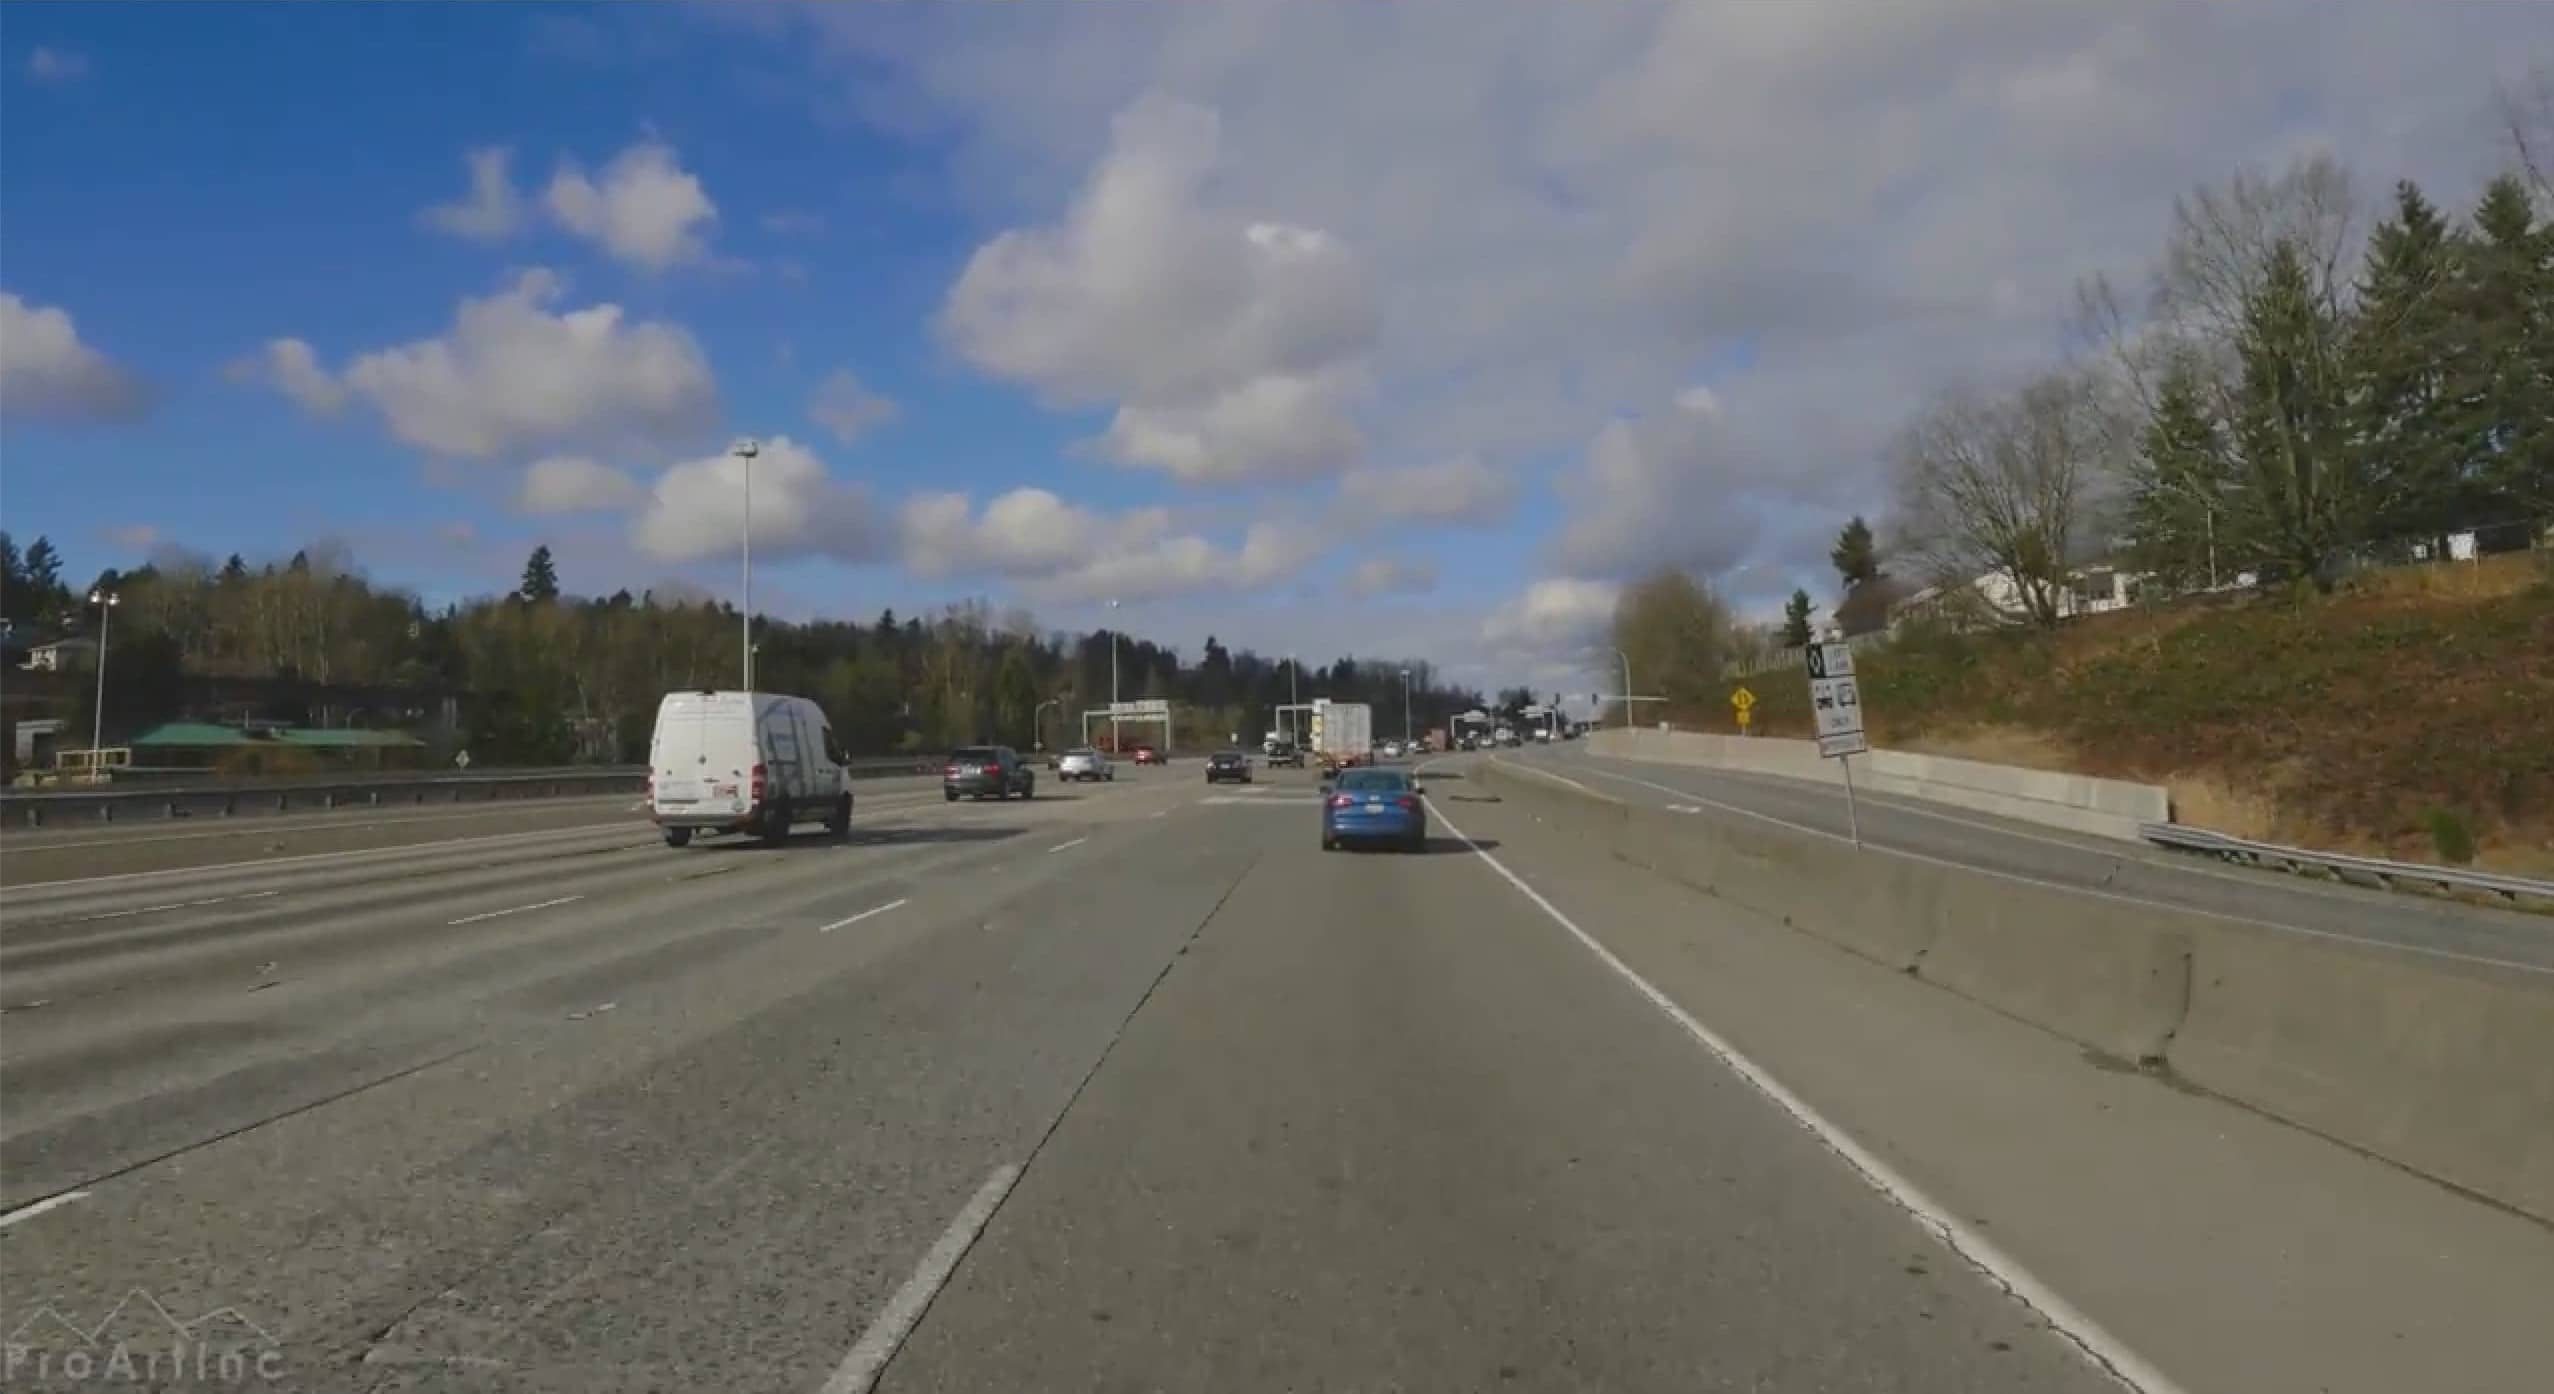
- Read in each frame of a video as an image.
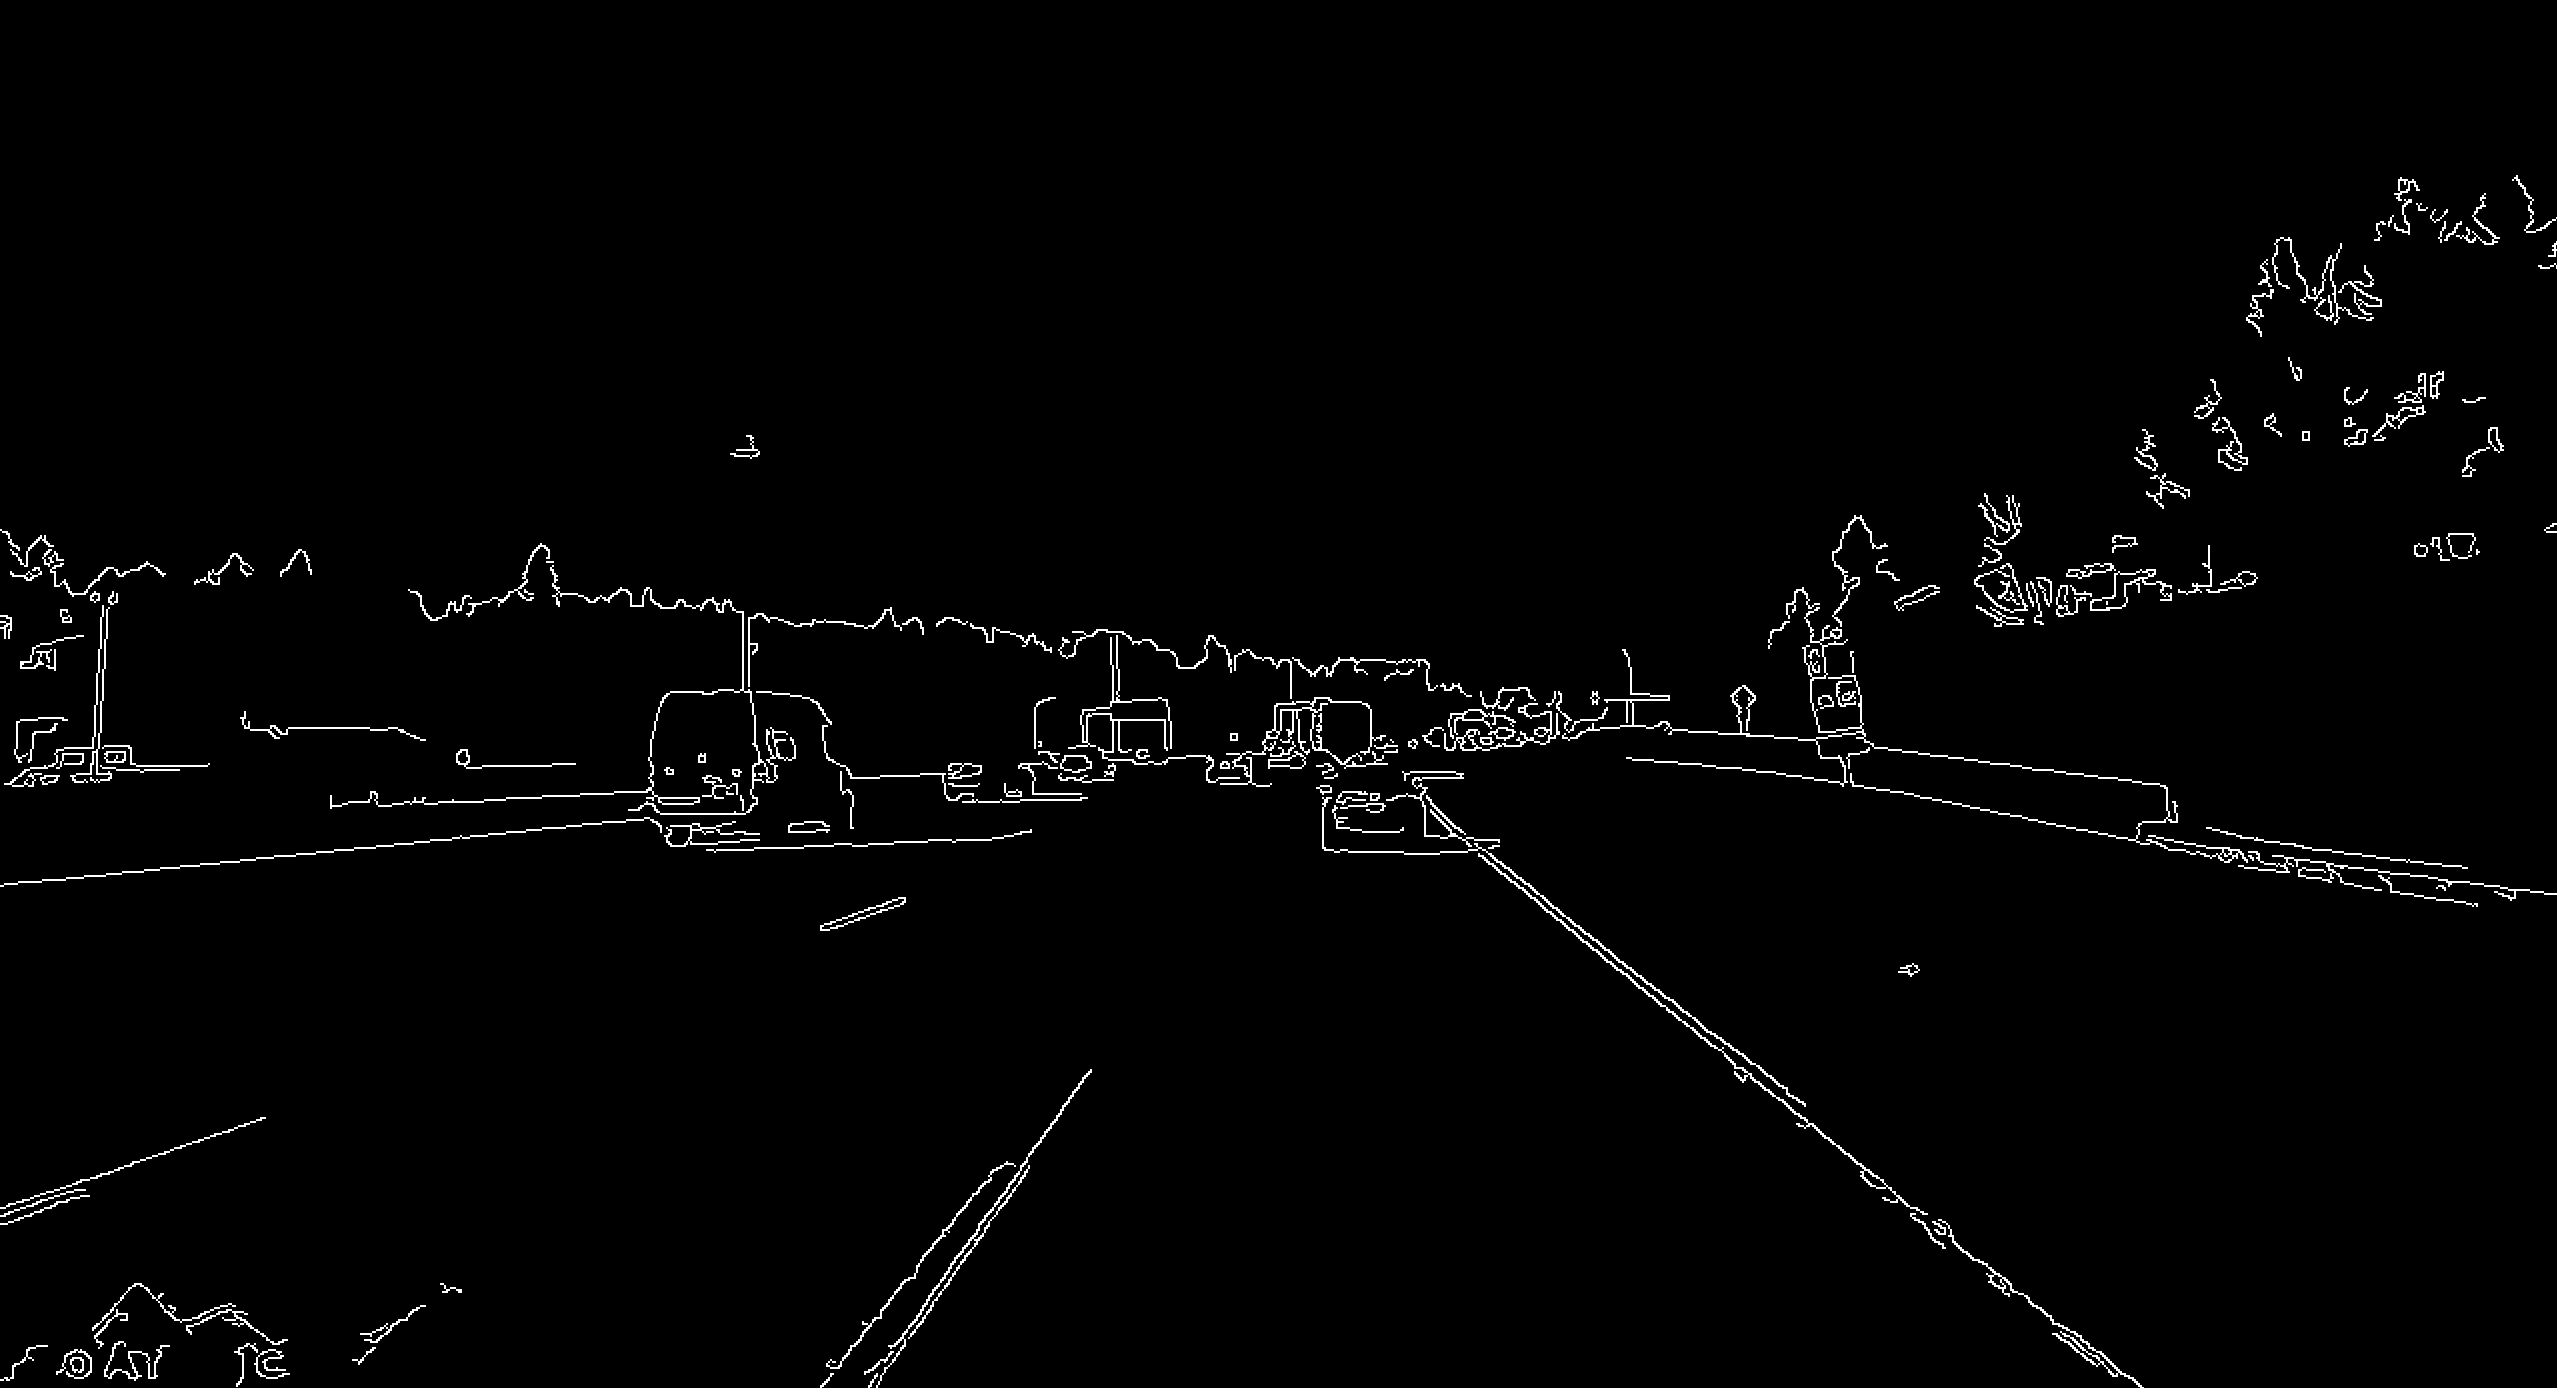
- Use Canny Edge Detection to retrieve a version of the image with only edges showing.
- Mask the parts of the image that you need which in our case is directly front and center of the driver.
- Use the Hough Line Transform to detect straight lines of a minimum length.
- With a polynomial curve fitter, average out the detected lines into one left and one right line.
- Overlay those lines onto the original video.
Tools
In addition to OpenCV, we’ll also need to bring in the math package from the Apache Commons library. Note that there are several Java-friendly versions of OpenCV floating around in the Maven repository. We opted for the one hosted by OpenPnP.
dependencies {
  implementation("org.openpnp:opencv:4.5.1-2")
  implementation("org.apache.commons:commons-math3:3.6.1")
}
Frame By Frame
Let’s open our input file using OpenCV’s built-in tools, read it frame by frame and pass each of those frames through our process outlined above to pull out the necessary data. To watch it in real-time, we will use Java Swing to create a window that will display each frame as it is processed.
val image = Mat()
val input = VideoCapture(inputFilePath)
val size = Size(input.get(Videoio.CAP_PROP_FRAME_WIDTH),input.get(Videoio.CAP_PROP_FRAME_HEIGHT))

// Setup the Swing window
val videoPanel = JLabel()
val frame = HighGui.createJFrame("output", HighGui.WINDOW_AUTOSIZE)
frame.defaultCloseOperation = EXIT_ON_CLOSE
frame.setSize(size.width.toInt(), size.height.toInt())
frame.contentPane = videoPanel
frame.isVisible = true

while (input.read(image)) {
  // do stuff
}
Edge Detection
Before we can apply our edge detection, we’ll need to do some clean up on our image. Specifically, we need to convert it to grayscale and then apply a 5x5 Gaussian blur filter to reduce the amount of noise. These steps will optimize for the edge detection algorithm. Note that a Mat is the type of object in which complex data, such as an image, is represented in OpenCV. It is a multi-dimensional array that stores information about each pixel.
fun getEdges(source: Mat): Mat {
    val gray = Mat()
    cvtColor(source, gray, COLOR_RGB2GRAY)

    val blur = Mat()
    GaussianBlur(gray, blur, Size(5.0, 5.0), 0.0)

    val dest = Mat()
    Canny(blur, dest, 50.0, 150.0)

    return dest
}
Our original image is read in as a Mat, converted to grayscale, filtered with a Gaussian blur and then has a Canny Edge Detector applied to it, the result of which is stored in dest and returned.
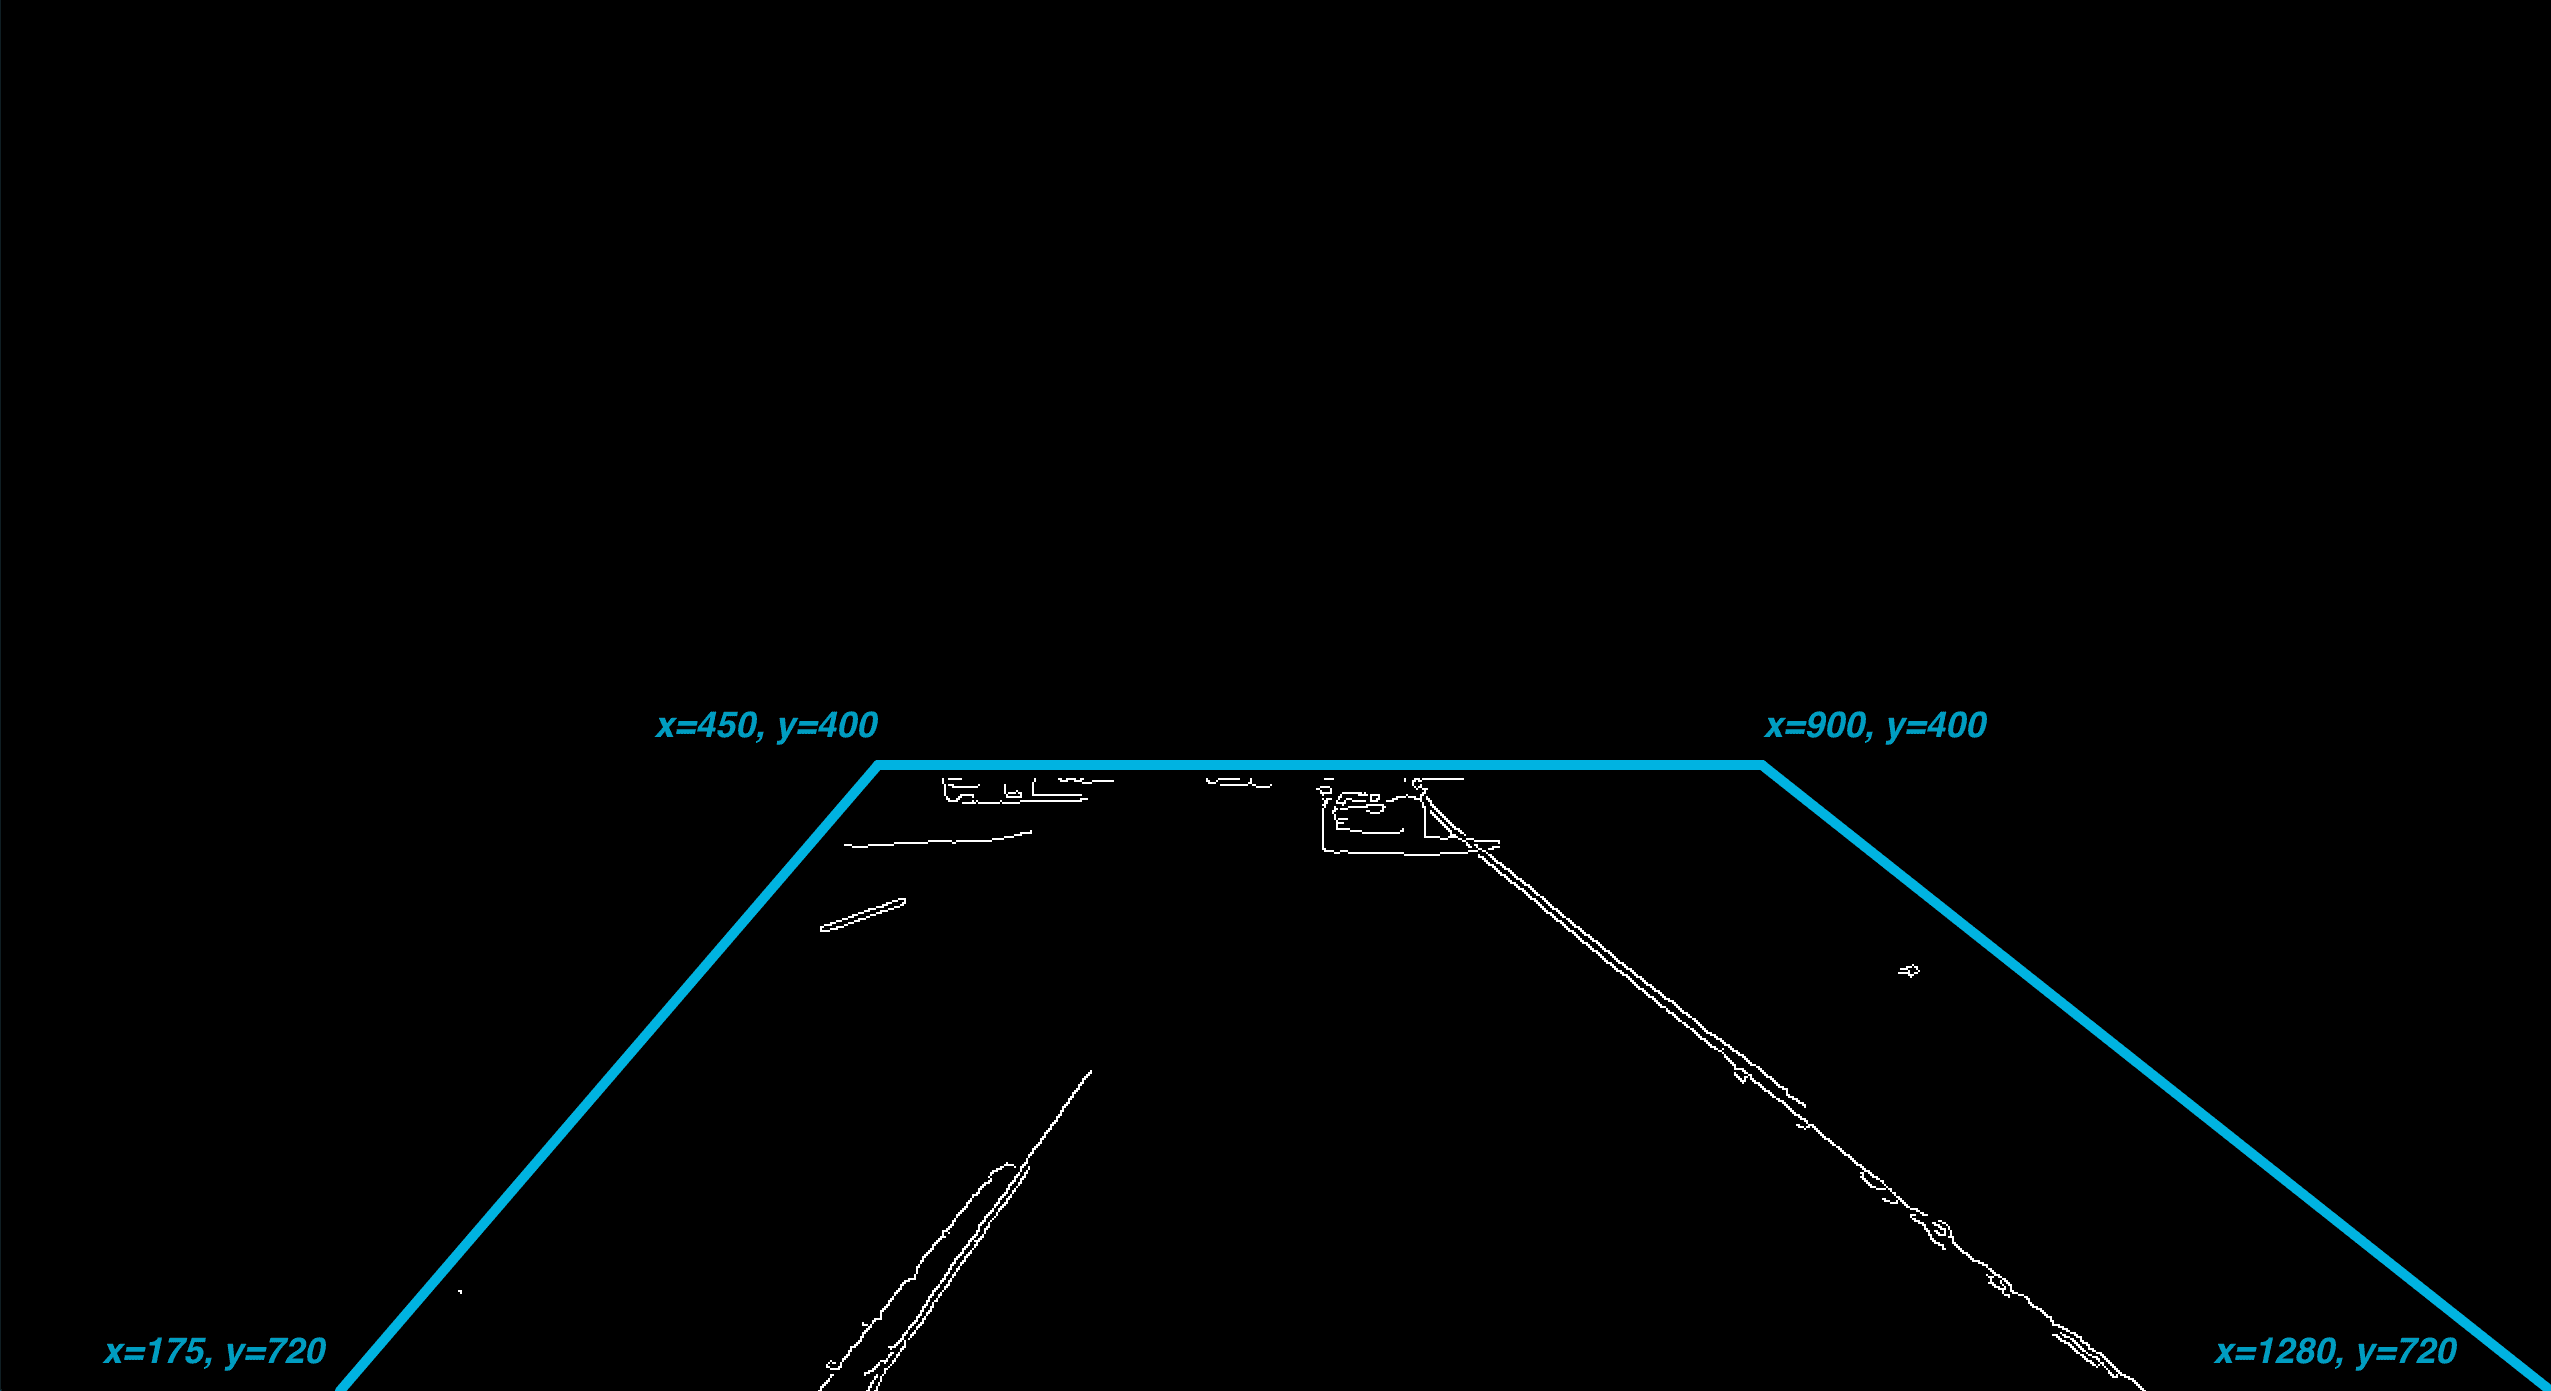
“Wear The Damn Mask”
Maryland pandemic jokes aside, we need to apply a mask to our image to cut out the parts that we don’t need. Without this mask, our line detector would be detecting lines such as the overhead freeway signs, other cars, etc. We just need to focus on the area immediately in front of the vehicle.
When deciding the shape and size of a mask in a Mat we need to consider the coordinate system. Typically, the x and y coordinates run up and to the right but in a Mat, they go down and to the right.
  x →
y 0 1 2 3 4 5
↓ 1
  2
  3
  4
  5
Using this coordinate system, we will draw a trapezoid which captures this space in front of the vehicle. We will then create a mask filled with zeroes and use a bitwise_and against that mask to slice out the part of the image that we need.
fun getSlice(source: Mat): Mat {
    val height = source.height().toDouble()
    val width = source.width().toDouble()

    val polygons: List<MatOfPoint> = listOf(
        MatOfPoint(
            Point(175.0, height), // bottom left
            Point(450.0, 400.0),  // top left
            Point(900.0, 400.0),  // top right
            Point(width, height)  // bottom right
        )
    )

    val mask = Mat.zeros(source.rows(), source.cols(), 0)
    fillPoly(mask, polygons, Scalar(255.0))

    val dest = Mat()
    bitwise_and(source, mask, dest)

    return dest
}
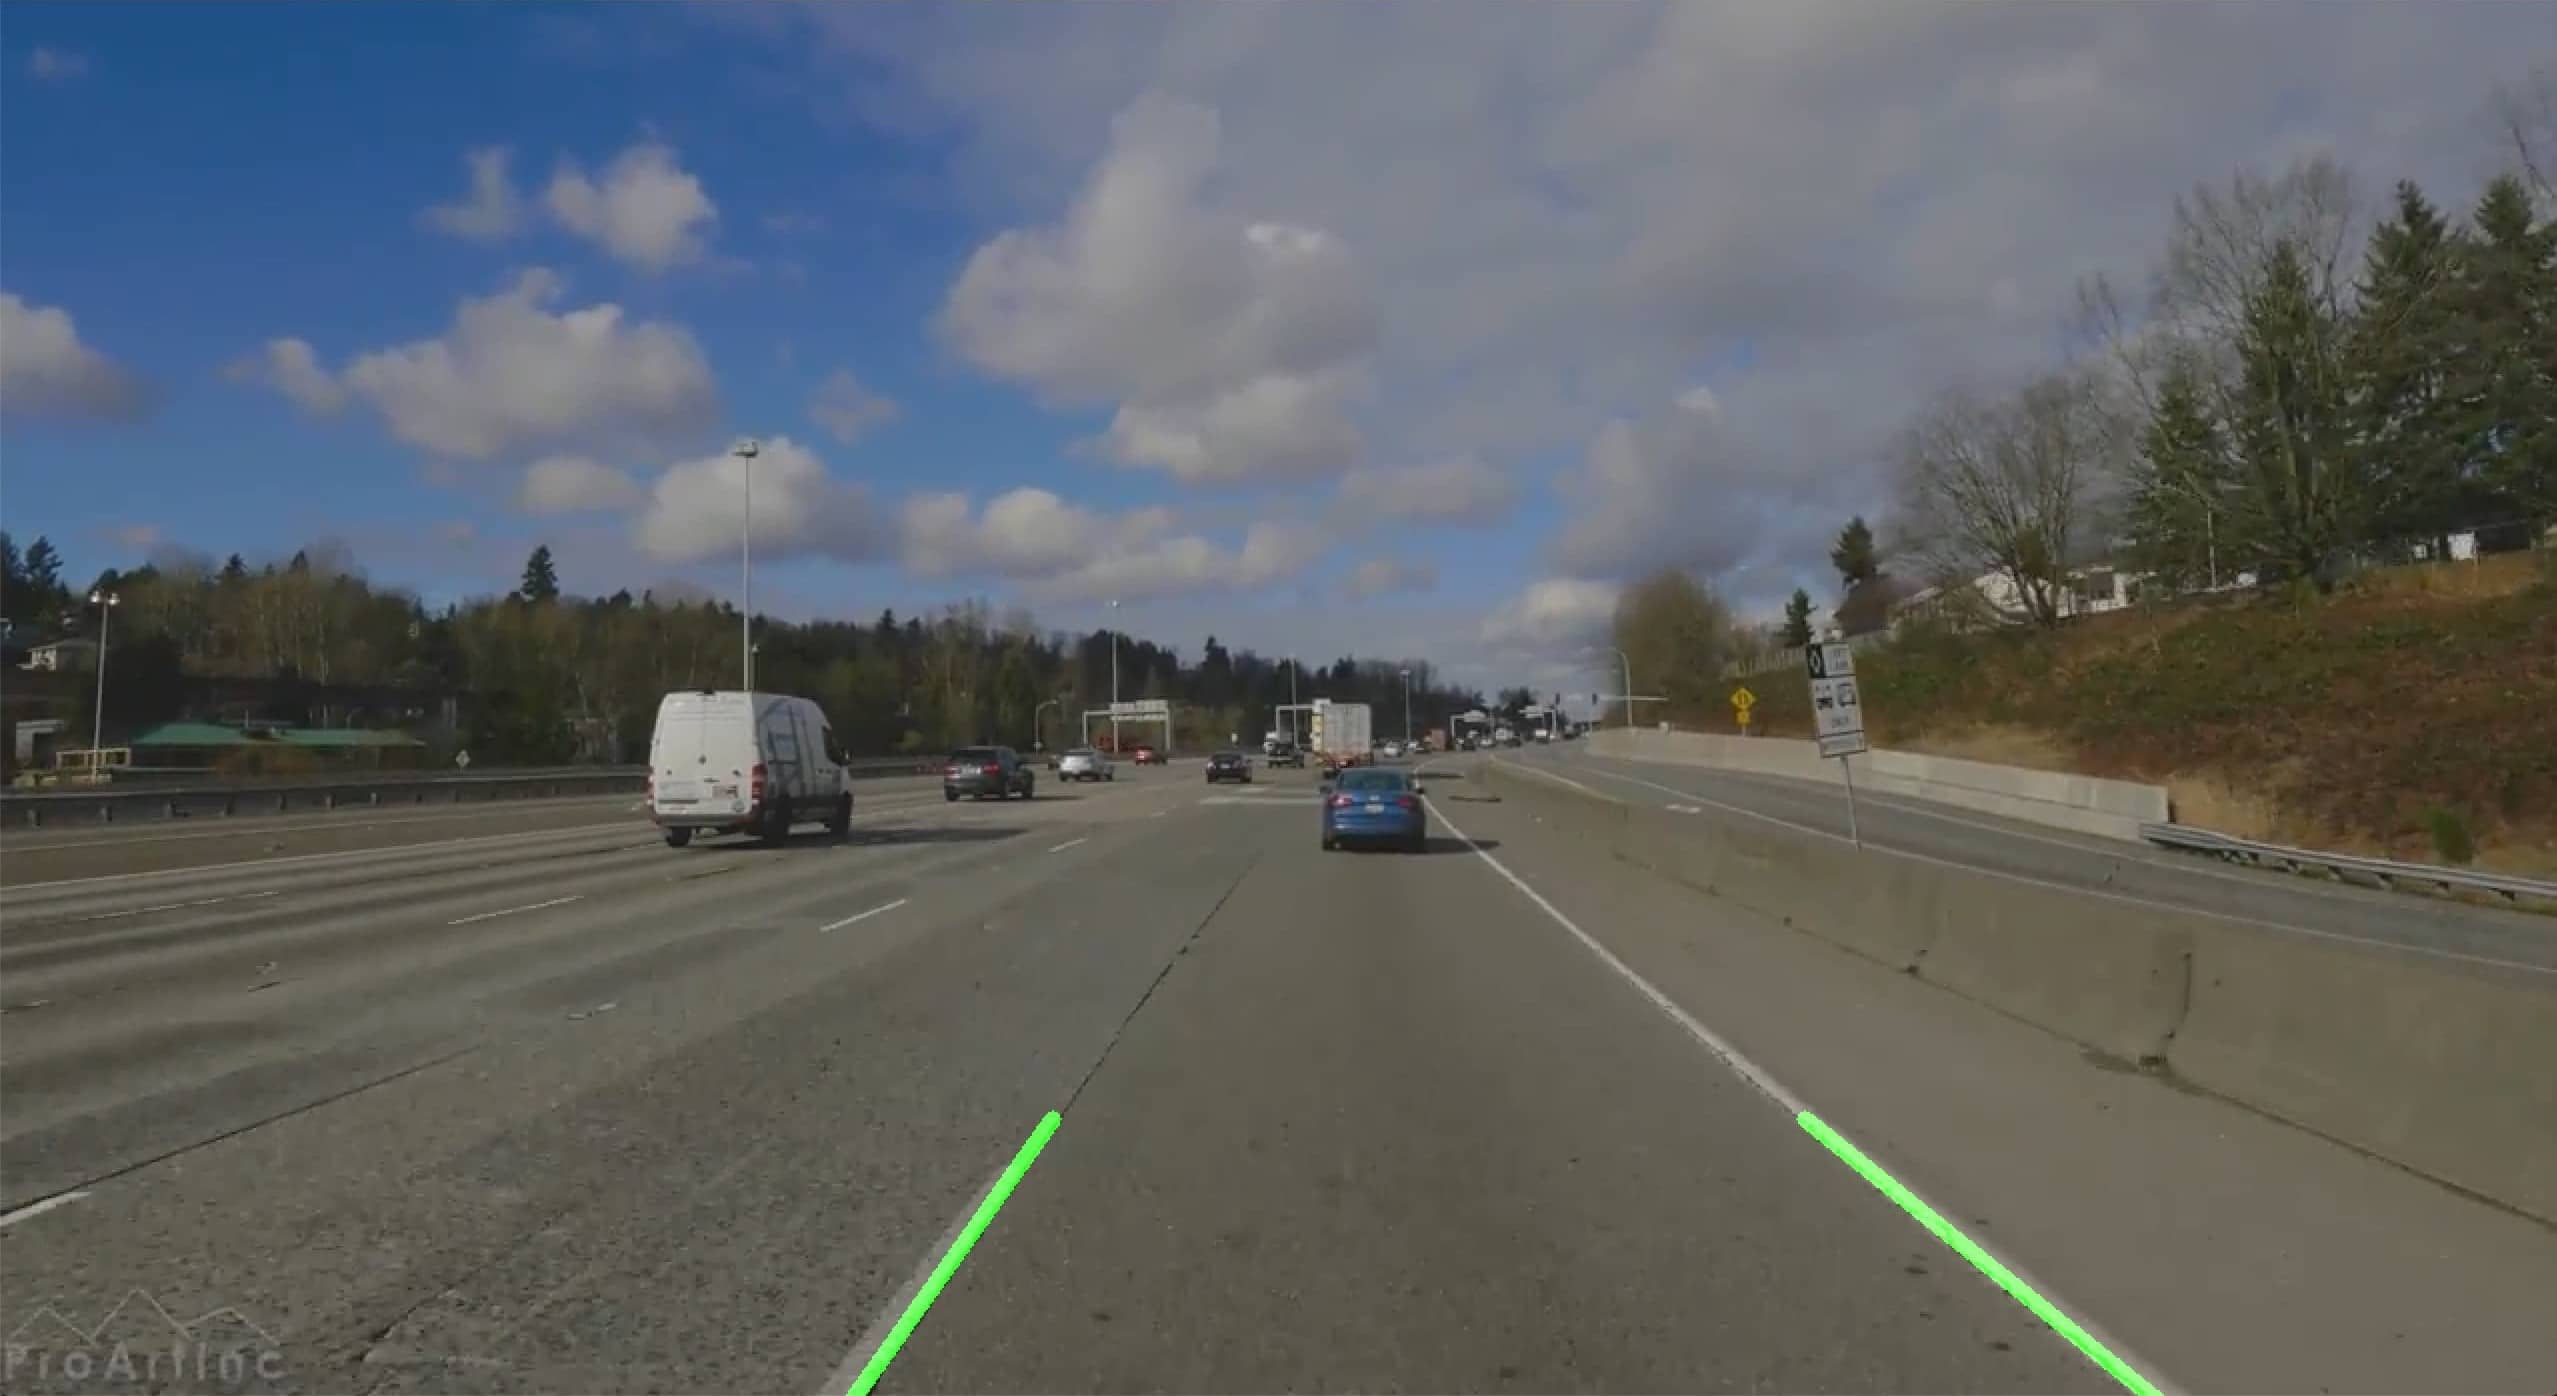
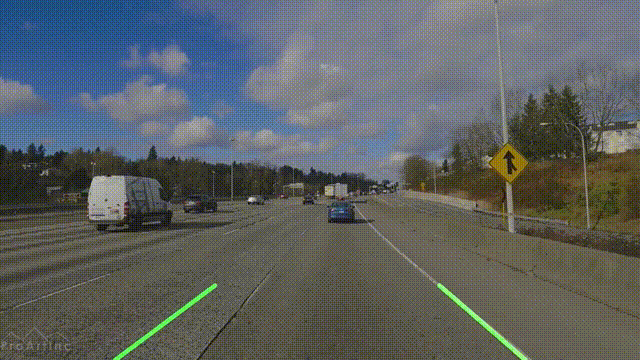
Visualize Success
With our mask in place we can now use a probalistic Hough line transform to try and guess where the straight lines are. We then average them out using a polynomial curve fitter to retrieve the slope and y-intercept co-efficients.
fun getLines(source: Mat): Pair<HoughLine, HoughLine> {
    val lines = Mat()
    HoughLinesP(source, lines,2.0, Math.PI/180, 100, 100.0, 50.0)

    val left = HoughLine(source)
    val right = HoughLine(source)

    for (row in 0 until lines.rows()) {
        val points: DoubleArray = lines.get(row, 0)
        val weighted = WeightedObservedPoints()
        val fitter = PolynomialCurveFitter.create(1)

        weighted.add(points[0], points[1])
        weighted.add(points[2], points[3])

        val fitted = fitter.fit(weighted.toList())
        val slope = fitted[1]

        if (slope < 0) {
            left.add(fitted)
        } else {
            right.add(fitted)
        }
    }

    return Pair(left, right)
}
If you recall from your high school geometry class, given a slope, y-intercept, and y value, you can calculate the value of x.
y = mx + b
We know the y values since they will match up with the y values of the trapezoid we drew. So that means we need to calculate the values of x.
x = (y - b) / m
In our HoughLine class we have the following code to get the value of x
val coordinates: Pair<Point, Point>
    get() {
        val y1 = source.height()

        return Pair(
            Point((y1-yInterceptAvg)/slopeAvg, y1.toDouble()),
            Point((y1-150-yInterceptAvg)/slopeAvg, y1.toDouble()-150)
        )
    }
With the coordinates of the detected lines in hand, let’s draw them on the original image from the video. We can make them really stand out by drawing them as thick bright green lines.
fun visualize(source: Mat, lines: Pair<HoughLine, HoughLine>): Mat {
    val grey = Mat.zeros(source.rows(), source.cols(), 0)
    val dest = Mat()
    cvtColor(grey, dest, COLOR_GRAY2RGB)

    val color = Scalar(0.0, 255.0, 0.0)
    line(dest, lines.first.coordinates.first, lines.first.coordinates.second, color, LINE_8)
    line(dest, lines.second.coordinates.first, lines.second.coordinates.second, color, LINE_8)

    val done = Mat()
    addWeighted(source, 0.9, dest, 1.0, 1.0, done)

    return done
}
Demo Time
With all the required functionality now written out, let’s update our while loop to make use of it.
while (input.read(image)) {
    val canny = getEdges(image)
    val slice = getSlice(canny)
    val lines = getLines(slice)
    val visualized = visualize(image, lines)

    videoPanel.icon = ImageIcon(HighGui.toBufferedImage(visualized))
    videoPanel.repaint()
}
Conclusion
I’ve been fascinated with computer vision for a long time but these two amazing articles, both written in Python using NumPy, inspired me to finally write a Kotlin version. The former article also does a much better job of explaining the math under the hood of OpenCV. While Kotlin doesn’t yet have quite the breadth and interoperability that NumPy does, efforts are underway to get there. It’s an exciting time to be a part of this community and I’m eager to see new developments in computer vision in Kotlin.
The full code for this post can be found here.